There’s no shortage of evidence that using an exit-intent popup or lightbox is an extremely effective way of salvaging abandoning site visitors. Simply put, an exit-intent lightbox is automatically triggered at strategic points throughout a site the moment a visitor “intends” to exit it (typically by moving the mouse pointer off the active window or screen). The goal of the lightbox is to present content that is engaging enough to keep the visitor from leaving.
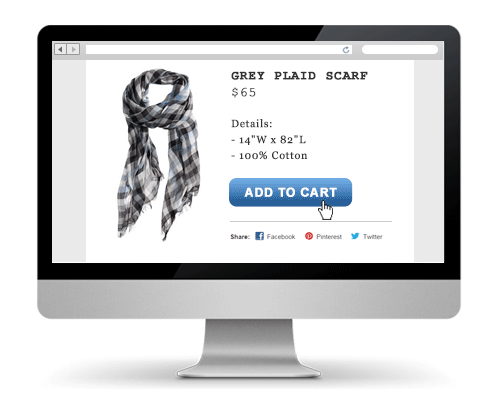
Examples of exit intent content include newsletter sign-up prompts, free downloads, and special offers or discounts. As you can see, triggering the display of promotional content is particularly effective when it comes to salvaging shopping cart abandonment.
If you are an ExactTarget (Salesforce Marketing Cloud) customer looking to augment your email marketing campaigns with some exit-intent technology, this tutorial is for you. By following these simple steps, you will learn how to create a Digioh Exit-Intent lightbox that integrates with an email list in your ExactTarget account. For lightbox content, the tutorial uses a simple newsletter sign-up form.
Part 1: Create Your Exit-Intent Lightbox
Step 1. Add a new lightbox
Log in to Digioh and click New Lightbox.

Digioh provides plenty of pop-up templates to get you started. On the Choose a Theme screen, select a theme suitable for email subscription sign-ups. You will customize and configure the lightbox in step 2.
On the Name Your Lightbox screen, enter a descriptive name (e.g., Subscribe to Newsletter) and click Save Name.

Step 2. Customize and configure your lightbox
The lightbox editor allows you to customize the look and feel of your lightbox with pixel-perfect precision. Choose your container, write text, design your form fields & buttons, and add your images. If needed, you can even add custom HTML and CSS to keep your lightboxes on-brand.
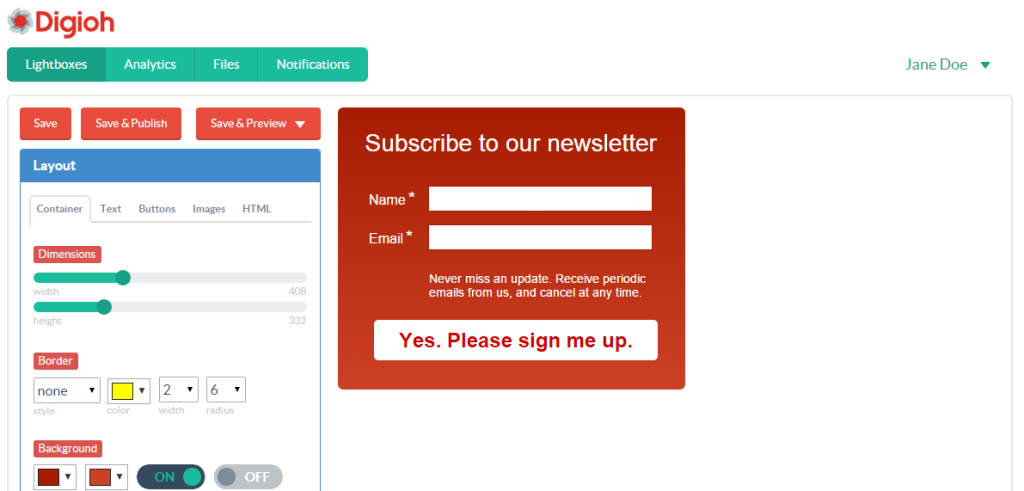
When you finish customizing the layout, click the Form section below the Layout section of the editor. In the After Form Submit drop-down list, select show thank you page. Here, you can design a Thank-You page that appears after visitors submit the form.
To preview how your lightbox will look and work, click Save & Preview and then select Preview Exit from the drop-down menu. When your lightbox looks and works the way you want, click Save.
On the Digioh navigation bar, click Lightboxes. Your new lightbox is now listed on the Lightboxes screen. You have not yet published the lightbox so it is not live.

Step 3. Add an Exit-Intent condition to your lightbox
Every Digioh lightbox has a condition that determines when it gets displayed. To make your lightbox appear when a visitor exits your website (in other words, to make it an Exit Intent lightbox), you must add an Exit Intent rule to its condition.
To start adding the condition to your lightbox, click Add in the lightbox’s Conditions column.
In the Conditions pop up, click Add Conditions.

Click Add New Rule.

In the Choose a property drop-down list, select Exit Intent under the Action section.
When the Exit Intent rule appears in the pop up, select the mouse action that will make the lightbox appear (for example, Mouse exits window top or Mouse exits window left). When you’ve made your selection, click Save.
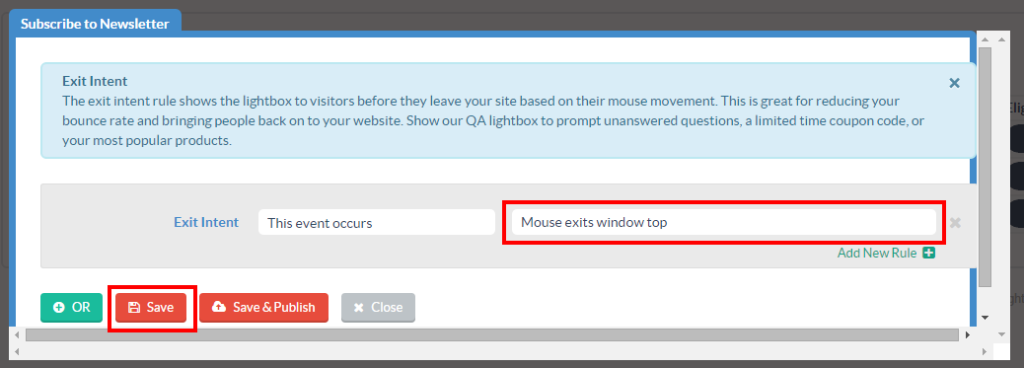
Tip: To make sure you capture exits from all sides of the screen, add a rule for each possible mouse exit (window top, bottom, left, and right).
Step 5. Publish your lightbox
Once you’ve added the Exit Intent rule and saved the condition, you’re ready to publish your lightbox.
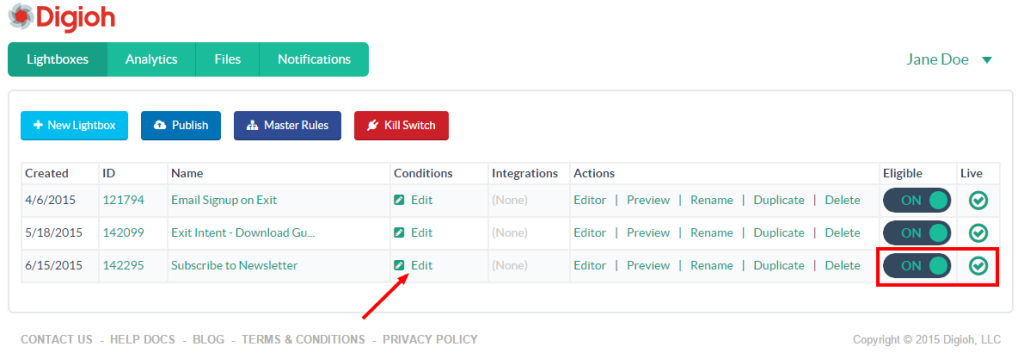
In the condition pop up, click Save & Publish and then click Close. The Lightboxes screen now shows that a condition has been added and that the lightbox is on and live.
Part 2. Integrate your lightbox with your ExactTarget account
To integrate your Exit Intent lightbox with your ExactTarget account, you must create an ExactTarget integration and then add the integration to the lightbox.
Step 1. Create an ExactTarget integration
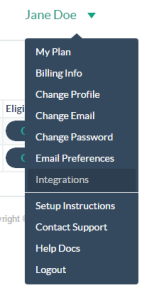
Click your name on the upper right-hand corner of the screen and then click Integrations on the drop-down menu.
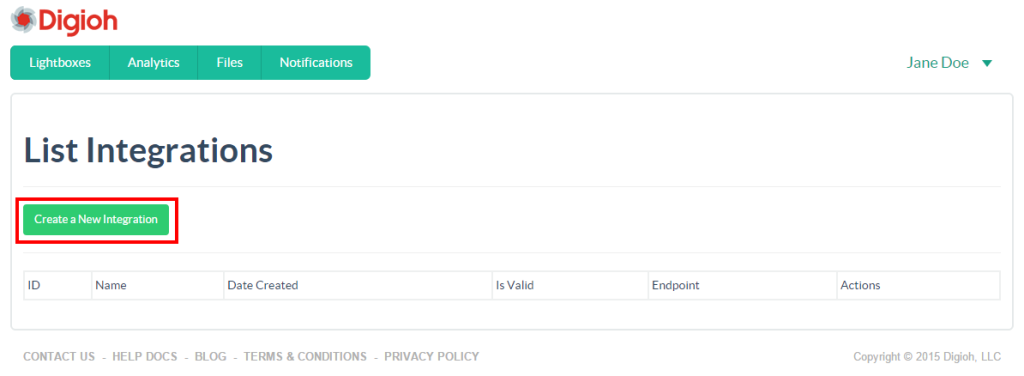
On the List Integrations screen, click Create a New Integration.
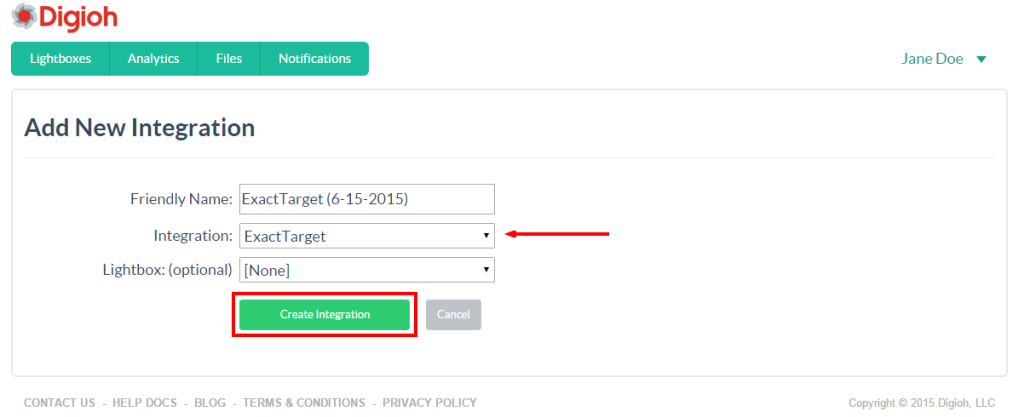
On the Add New Integration screen, select ExactTarget from the Integration drop-down list and then click Create Integration. If you want, you can also edit the Friendly Name.
Step 2. Connect Digioh to your ExactTarget account
When the Authenticate Your ExactTarget Account screen appears, enter your ExactTarget Username or Email and Password and then click Connect Account.
Step 3. Choose the ExactTarget email list
When the Choose List screen appears, click Select next to the ExactTarget email list you want to integrate with the lightbox.
The new ExactTarget integration now appears on the List Integrations screen. Confirm that Is Valid is set to True, the Endpoint is ExactTarget, and the email list is the correct one.
Step 4. Add the ExactTarget integration to your lightbox
On the Digioh navigation bar, click Lightboxes.
On the Lightboxes screen, click Editor in your new lightbox’s Actions column. You can also click the lightbox’s name.
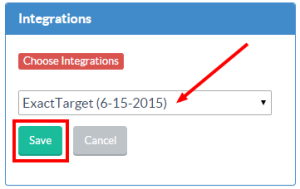
In the lightbox editor, click the Integrations section and then click Add Integration.
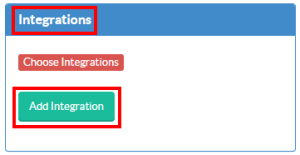
In the Choose Integrations drop-down list, select the ExactTarget integration you created in step 1 and click Save.
At the top of the editor screen, click Save & Publish. To return to the Lightboxes screen, click Lightboxes on the Digioh navigation bar.
The screen now shows that your lightbox is complete with a condition and an integration. It is on and live and ready for use.
Part 3. Integrate your lightbox with your website
The final piece in this tutorial is how to integrate your Exit Intent lightbox with your website. The Digioh lightbox app easily integrates with just about any ESP, website builder, CDP, shopping cart, and other marketing technology provider. In another post, for example, we showed you how to integrate an Exit Intent lightbox with Magento. To learn more about other available integrations, check out the Digioh Knowledge Base.